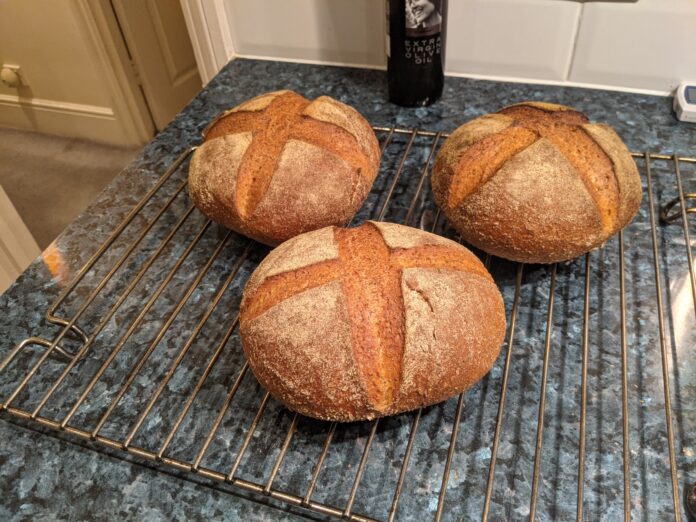
Ever fancied baking your own home-made bread? Here is everything you need to know. This is for normal bread, not sourdough.
TO MAKE TWO MEDIUM LOAVES (or three smaller ones):
- Flour – 1 ½ lb. Must be “strong” or “very strong” bread flour. Can be a mix of brown/white.
- Yeast – one sachet or 2 heaped teaspoons of easy-blend (see below)
- Salt – 2 rounded teaspoons
- Sugar – 1 rounded teaspoon
- Butter – 1 heaped tablespoon
- Water (warm) – 15 fl oz (¾ pint)
- It is sometimes nice to add a couple of handfuls of wheat bran, poppy seeds, raisins, sultanas, roasted grains, etc. Add them after rubbing in the butter.
Mix the flour, salt, yeast and sugar in a big bowl.
Rub the butter in with your fingertips and thumbs.
Add any extra ingredients (poppy seeds, sultanas, bran, etc) and mix in.
Make a well in the middle.
Add the water into the well and stir. It might be quite wet at first.
Bring together into a dough.
Knead
Turn out onto a work surface. At this point, clean and dry the bowl so it’s ready.
Knead well for 10 minutes, pushing the dough with the heel of one hand while holding it with the other. After a while, you will feel it becoming springy and smooth. The purpose is to stretch the dough, strengthening the gluten strands, which is what allows the bread to rise. If it is too wet, sprinkle flour on the dough and the work surface. Different flours will absorb different amounts of water.
Rise
Put the dough in the bowl and cover it with a clean tea towel.
Leave to rise until it has doubled.
In a warm place this might be 1 ½ hours, at room temperature 2 hours.
Slower rising (cooler temperature) means better flavour and texture (sometimes I use half the amount of yeast for this reason).
Knock down and shape into loaves
Put the oven on (I use 220°C – fan oven)
Put a roasting dish or similar in the oven to heat up (for the water).
Scrape the risen dough out of the bowl onto the work surface.
Knead four times only to knock down.
Cut in half (for two loaves). It’s best to use scales for this.
Round loaf: pull in to the top and press down. Turn over then push the dough underneath with the edge of your hands in a chopping motion, turning the loaf, to make a nice smooth top (look for videos on YouTube. The Allinson’s website is excellent.)
I rub flour over the top and bottom at this point (prevents sticking on the bottom and drying on the top). Place on the oven tray you will use to bake them. I find the best thing to sprinkle on the oven tray to prevent sticking is bran.
Prove
Cover with the tea towel and leave for 30 mins to 1 hour (depends on temperature).
Finishing touches
When the loaves are proved, finish them as desired.
Sprinkle flour on the tops and rub it in lightly.
Cut fairly deep slashes on the top with a large, sharp knife. They help the bread rise well. I find a serrated bread-knife best for this. Cut to about ½ inch depth. Take the cuts as far down the sides as you can.
You can be quite creative with the patterns you cut (diagonals, a diamond, a cross, a long straight line). This is the part I find most enjoyable. Search Google Images for ideas. You will be amazed what people do.
Bake
The oven should be at 220°C (though many people say 190°). Hotter temperatures (shorter times) produce crustier bread, cooler temperatures (longer times) softer bread.
Pour boiling water into the hot roasting tray to make steam during the first 15 mins of baking (the oven-spring phase, when the bread is rising). This keeps the surface of the bread moist so it can rise better.
After 15 mins, remove the water, otherwise you will have an excessively-tough crust. Also turn the loaves for even baking. Turn the oven down to 200° or 190° depending on your oven (hotter=crustier, darker bread, a matter of personal taste).
Check the bread after 35 mins. (It doesn’t matter if you open the oven, it will not hurt the bread). If it needs to be darker, leave it for another 5 minutes.
Cool on wire racks. Allow to cool properly (1 hour minimum) before cutting open, otherwise all the steam will escape and the bread will be stodgy and ruined.
Yeast options
- Fresh – 1 oz – Mix into the water before you add the water to the flour
- Dried (normal) – 4 heaped tsp (15g) + 1 tsp sugar + 5 fl oz out of the 15 fl oz water
- put the dried yeast and sugar in a jug and add 5 fl oz of warm water and stir. Leave until a good froth has developed on the top, then pour it into a well in the centre of the flour.
- Dried (easy-blend or quick action) – one sachet or 2 heaped tsp (7g), add directly to the dry flour.
The easiest and quickest option by far is easy-blend.
NB. Yeast is yeast. There is no difference in flavour from using fresh or dried or easy-blend.
What is “strong” flour?
Strong flour has a high protein (gluten) content. It comes from hard wheat.
Wheat contains two proteins, glutenin and gliadin, which form gluten when you add water and knead the dough.
To make bread, you need a strong flour. The gluten holds the dough together to make the bread rise when the yeast starts working.
For cakes, you use a softer flour.


